Saturday, September 8, 2012

Bridal Preview: Gloria


[[I can't figure out why my phone takes pictures that are slightly blurry and the color balance is off]]

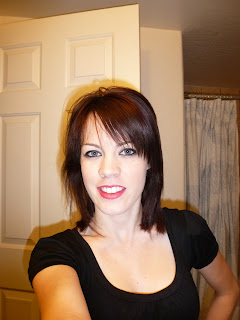
This afternoon I had the pleasure of meeting Gloria, an elementary school music teacher, and created a beautiful bridal look for her big day in a couple weeks. She is very sweet and I am very happy for her and her fiance, Luky. As I listened to her story, it warmed my heart and gave me great joy. Hearing where they come from and how they met and how they got to this point; their engagement (which was a surprise!), and now their wedding & future honeymoon plans. Her dress sounds exquisite from the description she gave me [cannot WAIT to see it!] & her colors are white and yellow & since I'm currently on an "I love yellow" kick - that made me even more excited to see the decorations on her big day.

 You're almost there Gloria! Thank you for allowing me to be a part of your day - I couldn't be happier for you guys - your fiance is going to be blessed by you & your sweetness. 

Lipstick & Loves,
Sara

Friday, August 31, 2012

Referral Program, Bridal Contest, and Halloween Makeup!

Hello Gorgeous!
     It's been a crazy, crazy past two months between weddings, events, and photo shoots, becoming a MAC Cosmetics employee and moving across town & getting the house in order - it's still not in order (check out my personal blog for more information on that!) Anyways, I have been sitting here this morning looking over photos from previous events and photo shoots and testimonials, and I am blown away by the wonderfully kind words of my clients. I cannot thank you all enough for trusting me for your makeup needs; from weddings to a girls' night out - I am beyond blessed to be able to work with so many beautiful women inside and out!
     As we gear up for the fall season, please note that most of my September appointments are booked, so hurry and book your appointment so you can get in this month! 


In addition to that, I am launching the start of a referral program for my lovely clients. Each client will receive business cards that say "referred by" on the back and a place to put your name. Give them to your family, friends, co-workers and anyone else you may cross paths with. Once you have a friend redeem a card, you and your friend will receive $20 off your next makeup application. The discount can be redeemed for any event.
 

My annual Bridal Contest is back!                             


I'm now booking appointments for Halloween Festivities! Perfect for Halloween parties & events. Book your appointment before September 30 and receive $10 off!


Lipstick & Loves,

Tuesday, August 14, 2012

Tip-full Tuesday: Colors that make your eyes pop!

Kelsi J. asks, "Hi Sara - what colors will make my eyes pop? They are brown."


I love this questions as I  to accentuate the eyes, after all they are the windows to our soul. Through the eyes you can see so much about a person - they're kindness, joy, happiness - you can see the beauty of their hearts!

The first thing to remember is that the best way to make colors stand out is to choose colors that are opposite the color wheel and flattering to your skin tone.

If you have brown eyes, colors that will make your eyes pop are: blues, teals, greens and purples.

If you have blue eyes, like me, colors that will make your eyes pop are: golds, oranges, coopers, and browns. Blacks and shimmery greys will pop too, as well as dark blues.

If you have hazel eyes, colors that will make your eyes pop are: blues, greens, teals, purples, deeper pinks, plums, coppers.

If you have green eyes, colors that will make your eyes pop are: reds, warmer/deeper pinks, plums, purples, and coppers. Dark greens, while not opposite the color wheel, will bring out your eyes if they are lighter green.

If you have amber eyes, colors that will make your eyes pop are: blues, purples, teals.

If you have black eyes, colors that will make your eyes pop are: teals, purples and metallics.


Also, black liner applied to the waterline adds nice contrast to the eyes and adds some great drama to the eyes!

 Shimmery shadows will also draw attention to your eyes, just be sure to use it in moderation.

Thank you so much for the question, Kelsi!


Tuesday, August 7, 2012

Tip-Full Tuesday: Eyebrows

I love how eyebrows can completely change your entire face! They are so expressive and with the ability to shape them, we are able to shape them in order to better fit our personalities. However, the downside to tweezing and waxing is that sometimes it leads to sparse brows as a result of over tweezing or waxing.

But - fear not! You can always fill in sparse brows with either an eyeliner pencil or eyeshadow.

The first thing you need to do is to pick the proper shade of pencil or powder - choose a color that is close to your natural brow color (generally one to two shades lighter than your hair color). If you have very blonde hair, choose a color that is one shade darker than your brows.

Next, comb out your brows so that they are in the shape that you would like.

If using a pencil, fill in sparse areas with short strokes that mimic the appearance of natural hair. You don't want to create a line, but a texture that appears like your natural browns.

If using a powder (eyeshadow or brow powder), use an angled brush and lightly dip in the shadow. Fill in sparse areas with short strokes.

The most important thing is to make sure that you like that shape and the appearance of your brows.


Tuesday, July 31, 2012

Tip-Full Tuesday: Moving Stress

Tomorrow was supposed to be our moving day! Which means that I have been feeling very stressed and overwhelmed with getting everything packed up (and EVERYTHING is packed up - just waiting to find out when the "real" move day is lol) - so I felt like it was appropriate to post on moving stress and tips on how to avoid it. It may not be blatantly obvious that this is related to beauty, but it is.

Stress effects us all in very different ways and our skin and physical appearance knows it very well. For me, I lose weight like nobody's business (contrary to popular belief, this is NOT a good thing), I get headaches pretty constantly, I'm exhausted all the time,I break out regardless of my skin care routine and I get anxiety over everything.  Other effects of stress include:depression, hair loss, weight gain, ulcers, and many others.


So how do we avoid stress? Well, unfortunately we don't and we can't, but we can do our best to prepare for it.  As we started on this journey, I knew how I'd react towards the end so I started preparing early.

  • If you're prone to anxiety or OCD (re)actions, start a list of things to do - this helps with seeing that you are actually accomplishing something on paper
  • Start packing early. I started a month in advance and started with all the little things that don't really have a home - this helps with the final packing days and not trying to figure out where a logical place for them to go is. 
  • Come up with a plan! I found this blog to be very helpful when we started packing
  • Keep your bedroom clean - a nice place to retreat to at the end of the night is relaxing.
  • Stay on top of laundry - if you're like me, you will want to wear your comfy clothes and it's a hard thing to do when they're all in the wash. 
  • Light candles
  • Eat healthy 
  • Take a moment for yourself and take deep breaths when you need to. 
  • Get out and enjoy the outside if you can 
  • Go to bed at a decent time
  • Exercise, the endorphins will help.  
  • Ask for and accept help
And, when all else fails - make some popcorn, grab some chocolate and enjoy a movie while you regain your sanity. 

I hope that if you're moving, you have as stress-free of a move that you can!

Lipstick & loves

Tuesday, July 24, 2012

Tip-full Tuesday: Cleaning Makeup Brushes

Happy Tuesday! I was on a photo shoot recently for a new model and she asked me why I had a big bottle of brush cleaner with me. This launched us into a some-what lengthy discussion of the importance of cleaning brushes that are used on clients as well as the ones that are used for personal use. She quickly exclaimed "Oh gosh! I NEVER clean my brushes! Is that why I break out all the time?"

Well, I can't say that it is the sole reason that she has acne break outs, it may very well be a contributing factor. Brushes that don't get washed regularly have a build up of makeup, facial oil, and bacteria in and on them. This can definitely lead to acne breakouts as well as altering the color and effectiveness of the product and causing the brush to feel rough on your skin.

If you look on the internet there are TONS of blogs and websites with information on how to clean brushes, so here's another one.

There are two ways that I clean my brushes.
For my work brushes, I clean them immediately after each client with either, MAC's or Cinema Secret's brush cleanser and sanitizer and once or twice a week (depending on how busy I have been), I deep clean them with a shampoo.
For my personal brushes, I clean them about every other week.


To clean your brushes with MAC's/CS's cleanser:
  • Get a towel you don't care for or paper towels & pour out some of the brush cleaner into a small cup
  • Carefully dip the bristles of brush into the cleanser - making sure not to get the metal where the bristles meet the handle wet.
  • Bring your brush along the towel in a sweeping motion, until it no longer leaves any product on the towel. Add more cleanser as you need
Lots of product build up on my personal brushes


All Clean!


 To clean your brushes with shampoo:
  • Fill a cup with warm water
  • Carefully dip the bristles of the brush into the cup, being sure not to get the metal where the bristles meet the handle wet. 
  • Keep holding it bristles down, take a small amount of shampoo (I use the shampoo I use on my hair - UNITE Eurotherapy) and gently massage it into the bristles. 
  • Rinse with water, careful to avoid the handle getting wet
  • Lay flat and reshape the bristles to dry - drying time varies - some take a half hour, some take overnight.
 Happy Cleaning!

Tuesday, July 17, 2012

Tip-Full Tuesday: Gel and Liquid Liners

Hello Lovelies,
Kaity S. e-mailed me this question:
"Hi Sara. I recently bought new a gel and liquid eyeliner to try out. My pencil has felt really waxy lately in the Arizona heat. What is the beat way to apply these kinds of eyeliners? When I try, the libe is never straight.  Thank you for your help, Katie S."
 Thank you Katie for asking this question! I personally love gel and liquid liners - the color is much more dramatic than a pencil.

For gel liners, you want to get either an angled liner brush or a bent liner brush. Put as little of the gel liner on the brush, it's always better to start with less and add more. When applying to your eyelid, get the brush as close to the lash live as you can. Start in the middle of your lash line, and using short strokes work your way to the outer corner of your eye. Next, repeat the small strokes starting at the inner corner and connect it to it the rest of the line.  The reason  for doing the inner corner last is because the brush will have less product on it which is important due to the smaller area you have to work with.

Similarly, when applying liquid liner you want to use shorter strokes, starting at the center and working your way out and then going back to the inner corner and connecting to the rest of the line.

Happy Tuesday,
Sara

Monday, July 9, 2012

Tip-Full Tuesday: Makeup for Monolid Eyes


I love asian eyes - I think they are absolutely beautiful and so much fun to make up, however, I get a lot of girls asking how to apply makeup to asian/monolid eyes. 


So here we go:
  • You always want to apply primer to your lids like MAC's Prep & Prime Eye or TooFaced's Shadow Insurance. (Both are phenomenal products)
  •  Using a flat stiff brush, sweep a dark shadow over the entire lid, creating a round shape up to the crease (I prefer to use something with a little shimmer to it like MAC's "Smut" or "Twinks")
  • Blend out with a champagney or peachy pink color (MACs "Dazzle Light" & "Honey Lust" are favorites as well as Bare Escentuals "Trust") - making an upside down "u" shape...and blend blend blend
  • Go back with the darker color and blend
  • Highlight the brow bone with a highlighter color - (MAC's Vanilla, Brule, Dazzlelight)
  • To "round" the eye, take a lighter shimmery color and apply to the middle of the lid. 
  • Using an angled liner brush, smudge black shadow (MAC's Carbon or Tuxedo) along the lash line, blending it out to soften the line.
  • Using the angled liner brush, take the dark shadow you used on the lid and smudge on the outer half of the lower lash line - this will open up the eyes. 
  •  If you would like, use a lighter shimmery color and apply to the inner half of the lower lash line.

Saturday, July 7, 2012

July Newsletter

Hello Beautiful,
I finally e-mailed out this months newsletter (a week late due to craziness) and I the wrong photo uploaded for the product launch section! Agh! I could kick myself. The current photo shows Beth Ditto, but it should be a photo of Carine Roitfeld.


Photo by the amazing Mario Sorrenti

My sincere apologies on that colossal mistake!


Monday, July 2, 2012

Newsletter

My sincere apologies, but this month's newsletter will be late. It will hopefully be out by this weekend.

Mother ofbthe Groom: Barbara

On Saturday, I had the pleasure of meeting Barbara and her vacation rental here in the East Valley, as she prepared to welcome a new daughter into her family - her son's soon-to-be wife. Barbara was a lot of fun - very sweet and very happy for her son. I got to hear all the stories of her sob's courtship with her (now) daughter-in-law, the proposal, wedding plans. I always find it to be heart warming to hear the happy stories from parents or in-laws. You can just hear the joy in the voices saying, this is my son and this is what he did with his life after we raised him right OR this is my daughter and she's found a man who loves and respects her...

Barbara's dress was phenomenal; a champagnes-y color who an exquisite copper jacket with just a touch of bling- I wish I had gotten a photo of it. Her hair and makeup accentuated her inner beauty. She was really lovely.


Unfortunately, my phone is holding those photos hostage at the moment, but if I can get them off I will definitely post them.


Congratulations, Barbara, on your son getting married and congratulations to the new Mr. and Mrs. Baker. I wish you all the best

Saturday, June 30, 2012

Desert Contrast Photo Shoot

It's June in Arizona - which means it's hot. This is my first full summer in Arizona and I was shocked at how stinkin' hot it was at 5 AM when I left the house yesterday! Thankfully, everyone was prepared for the heat with lots of water!

This shoot was the first time I met my client, LaShelle, and the photographer, Scott, in person. I love meetings like this though - the excitement of the day's photoshoot makes for a great atmosphere and high energy introductions.

LaShelle was so much fun and the Scott and his wife were absolutely fantastic! It was hot, we were in the sun - but we got some very wonderful photos. Major kudos to all involved for sticking with the hot summer sun and working so hard in it!


Friday, June 29, 2012

Bride: Danica

Danica was absolutely stunning - her joy radiated from inside. She's fun and calm and her joy radiates from within her. She was a blast to be around and her bridesmaids were beautiful divas who wanted to make sure everyone was having a good time! I was so thrilled that I was able to be a part of such a fun day - it was a party and it was great!


Congratulations to you and your husband Danica! 


Thursday, June 28, 2012

Photo Shoot: Kae

I absolutely love this girl! Kae is a dear and sweet friend and I had so much fun on this shoot with her! She is a ball of energy, sweetness & silliness!

Here are a few photos from our fun outing together!


Wednesday, June 27, 2012

Music Video Launch!

Hello lovelies! Here's the music video I had the privilege of doing the hair and makeup for! Enjoy!


Tuesday, June 26, 2012

Tip-full Tuesday: Faux Bob

I'm currently trying to grow my hair out - I've been trying since before we got married in 2010, but I keep asking to chop it off then decide within a week that I should have continued to let it grow it out. Now that temperatures are pretty consistently in the 3 digits (I may not be fully ok with that), the thought of chopping everything off again is sounding attractive - but so is having long hair.

Enter the Faux-Bob. You've seen celebrities like Kim Kardashian, Kristen Stewart, Demi Lovato, Taylor Swift and Amy Adams rock the faux-bob on the red carpet countless times. You may have even been fooled thinking that they had chopped off their gorgeous locks (I know I was a few times)! The faux-bob is a great way to get your hair off your next without having to resort to a pony tail, or a bun and it's pretty simple to do too!


 All you will need is:
  • A brush
  • A rat-tail comb
  • Bobby pins
  • Clips
  • Shine spray (optional)
  • Hair spray (optional)


Step One:
Brush your hair and make sure you have any and all tangles out.


Step Two:
Using the rat-tail comb, separate your hair into two sections - one upper and one lower. I suggest starting at one ear and drawing a line with the comb up and over to your other ear.


Clip it out of the way using an alligator Clip.


Step Three:
Section out the hair you did not clip out of the way into 2 sections, making sure that the section you will not be working on first is slightly larger. (it doesn't have to be perfect)


Step Four:
Taking the first section (I used the section near my left ear), roll your hair under about 2 inches (More of less depending on your hair length and how short of a bob you are going for. Secure at the nape of your neck with a bobby pin. For added security, add 1-2 more pins to make sure it stays in place.


Tuck
 & Pin
 Step Five:
With the remaining hair, separate it out, this time make sure the next section you will be working with (I used the section near my right ear) is slightly larger, leaving about a 2 inch section in the between the two sections. Repeat Step Four.


Step Six:Now take the last section (the middle section) and smooth out gently with the rat-tail comb. Tuck and pin. This will ensure that your hair looks uniform and not separated out.


Step Seven:

Before releasing the top section
Release the hair you clipped up. If your hair is layered and shorter on top you may not need to do anything except finish up the style.


I just teased the hair at the crown of my head and let it fall onto the back.


    However, the hair that frames my face is significantly longer and needed to be tucked and pinned. Again, depending on the length, you may not need to do this - you may be able to pull of the A-line bob. I felt like my hair was a little too long in the front to make it look like a good A-line, so I tucked and pinned.


Step Eight:This is entirely optional:
Finish off with a slight misting of shine spray (I use Unite Eurotherapy's Shina Mist) or hair spray (I use Unite Eurotheraphy's MaxControl).


Enjoy!

                                     After


     Before


Tuesday, June 19, 2012

Tip-full Tuesday: Swimming Hair

It's summer time and temperatures are rising and vacations are in full swing!  If you're like most of my friends, that means you are spending lots of time in the water.
   To prevent damage to your hair while swimming this summer, be sure to wet your hair down with fresh water before jumping into the pool or ocean. The fresh water will fill in any porosity in your hair helping to prevent chlorine or salt from penetrating your hair and strippibng color from your hair.

**I love Sephora and think that they give awesome advice. However, Sephora recently posted on their Facebook page  that you should coat your hair in Vaseline before going into the pool, PLEASE DO NOT DO THIS. It is the humble and professional opinion of many professional hairstylists that this will do more damage than good.

Sunday, June 17, 2012

June 19 - June 22 Special

Hello my Lovelies,
Head on over to www.lipstickandloves.com and check out the special on ALL sessions this week!

Lipstick & loves, 

Wednesday, June 13, 2012

Wax Society Music Video

It's summer time and things are getting crazy - which is absolutely FANTASTIC!
Last week I had the great pleasure of meeting Red & Summer, the Kid of Wax Society and working on the set of their newest music video.

It was a blast, they're pretty awesome people and musicians.
I can't wait to see the end result.
Go check 'em out!


And I will keep you posted on the video release.

Sara

Tuesday, June 12, 2012

Tip-full Tuesday: Makeup for Dark Complexions

Hello Lovelies,
I cannot tell you how many times I have worked with women with dark complexions and have them tell me horror stories of makeup artists who have turned their skin ashy/grey looking because they don't use the proper products.
I have also had many girls and young women just entering into the makeup world ask me for tips because they just don't know - most recently from Denika, who sent this note:
 "Hi SaRa, 
     I m 13 and a mocha diva as mu friends say. I hav tried some makeups but they dont work for me ~~make me loook sik or just weird. hhow do i pik guud makeup for mee? Thnx."

*Choose foundation that has undertones of yellow and red. Dark complexions on the lighter end generally have more yellow where as on the darker end of the spectrum they tend to have more red. Always be sure to see how the color looks in natural daylight - store lights distort colors.

*Since dark skin has more pigment than fair skin, choose blushes on the darker end of the spectrum of berries, peaches and pinks. To apply, start with less - it's always easier to add more color than take it away. This is true for all skin tones.

*Lip colors that will work well are plums, pinks and purples that have a hint of gold, deep berries, and browns that have a hint of red to them.

*When looking for eyeshadow colors, the options are pretty much endless. You can use browns, blues, red, deep purples... If you don't know where to start, below you will find a list of MAC suggestions. (Anything starred is a personal favorite)

Neutrals
Bisque
Bronze
Brown Down
Brown Script*
Embark
Espresso
Handwritten*
Naked Lunch*
Satin Taupe*
Vanilla*

Blacks, Greys and Silvers
Black Tied
Carbon*
Electra
Print
Silvering*
Smut*


Reds and Pinks
Hepcat
Paradisco
Sushi flower*
Oranges
Antique
Coppering*
Kid
Mythology*

Golds
Amber Lights*
Dreammaker
Gorgeous Gold
Woodwinked*

Greens
Club*
Green Smoke
Lucky Green*
Velvet Moss

Blues

Aquavert
Deep Truth*
Electric Eel*
Freshwater
Moon's Reflection
Plumage*

Purples
Beautiful Iris
Beauty Marked*
Contrast
Vibrant Grape*
Sketch*


Thanks again for your wonderful question Denika - have fun & stay beautiful.


                                        Sara


Tuesday, June 5, 2012

Tip-full Tuesday: What to Bring on a Summer Trip?


Christine sent me the following question:
"Hi Sara! I have a family trip scheduled this summer and I have been told by my mother that I can't bring ALL of my makeup....so what beauty products would you bring or suggest I bring on a Summer trip when space is limited? Thanxx for your helpp! - xo Christine C."

     Can I just say that today's question is awesome? I used to struggle with this very thing when I would travel. It can definitely be difficult to pick and choose what to bring, especially on a longer trip when you don't know what kind of a makeup mood you will be in. But I have finally gotten the selection down to a reasonable amount of products!

First, ask yourself this question: What kind of a trip is this? If you are going to be at the beach the entire time - your choices will be different than if you're planning on traveling around New York or London. Is this a leisure vacation or an active business trip?

If you're going on a summer vacation and plan on taking it easy most of the time, it's easy to pair down your beauty products to the bare essentials. For "take-it-easy" trips or trips involving camping or hiking, I pack:

Day Products:
  • Facial Cleanser
  • Makeup Remover
  • Sun Screen (current favorite: Neutrogena Age Shield with Helioplex)
  • Tinted - Moisturizer
  • Water-Proof Mascara
  • Tinted Lip Conditioner/Chap Stick
Evening Products:
  • Eyeliner Pencil (twist up) OR liquid liner
  • Pressed Powder Compact with powder puff
  • Medium Pink Lipstick (can be used as a cream blush and a lip color)
  • 2-4 NEUTRAL shadows (2 if they are in separate containers, 4 if they are in a quad):
    • Highlight Color
    • Medium Color - can be applied lighter to the lid and heavier to the crease to create depth and drama.  
    • MAC's 252 Large Shader Brush (for small eyes, bring a smaller shader brush, like MAC's 242 or 239)
 All of this can be packed easily into a small makeup bag AND allows you the ability to get playful with your makeup for going out at night while not clashing with any of your wardrobe.

For bigger city travels, I pack:
 Day Products:
  • Facial Cleanser
  • Makeup Remover
  • Sunscreen
  • Moisturizer/Tinted Moisturizer
  • Full Coverage Foundation ([High end] Face Atelier or [low end] Revlon Color-Stay)
  • Pressed Powder Compact with powder puff
  • Blush (Nars: Amour)
  • Blush Brush
  • Waterproof Mascara
  • Tinted Lip Conditioner/Chap stick
Additional Evening Products:
  •  Lipstick
  • Eyeliner Pencil (twist up so you don't need to worry about a sharpener) OR Liquid Eyeliner
  • MAC's 252 Large Shader Brush (for small eyes, bring a smaller shader brush, like MAC's 242 or 239)
  • 1 highlighter shadow, 2 medium shadow, 2 dark shadow
    • one set in brown neutrals
    • one set in grey/black neutrals
Again, all of this can be packed easily into a small makeup bag and still allows for diversity in your looks.

If, for whatever reason, you can only pack a couple things - and it happens - I pack:
  • Facial Cleanser
  • Sunscreen
  • Tinted Moisturizer OR Foundation
  • Powder
  • Eyeliner
  • Mascara
  • Lip conditioner, chapstick OR lip gloss. 
No additional brushes, most of it can fit in a ziplock baggie.


     As far as other beauty products, if you have the room - remember lotion and pack your own shampoo and conditioner. Chances are what you use is better for your hair than what is given at most hotels/motels.I use Unite Eurotherapy's Volumizing Shampoo, Volumizing Condition, and their Moisturizing Repair Treatment.
     I highly recommend Unite Eurotherapy's products. For many reasons: Quality products, Cruelty-Free, 100% Vegan, Color Safe and Free of: Sulfates, Parabens, Gluten, Sodium Chloride, DEA, and Mea,
You can get them online or in salon's that carry the product.


Hope that helps your packing!

Lipstick and Loves,
                Sara

Monday, June 4, 2012

New Website!

Hello Gorgeous!
   I am SO excited to announce the launch of my re-glammed & new website!


I am still working on a few little thing - but there are updates on everything - new photos, new updates on the news & specials tab, and easier navigation and social media connections on the contacts page as well as a way to sign up for the monthly newsletter that features upcoming product launch information, makeup tips and special offers you can only get through the newsletter! 

So go check it out and send me a note with any questions, comments or suggestions!
Thanks for all the support!


Lipstick & Loves, 
          Sara

Sunday, June 3, 2012

Bride: Alanna

     I met Alanna last week and immediately felt like we were just old friends meeting up again and I was very excited to be able to share in the most important day of her life. She has such a bubbly, kind, sweet spirit that shines through, even through the stresses of her wedding day. As I entered her friend's gorgeous house, I was immediately greeted by smiles, mimosas and some of the most cheerful and encouraging women I have met. Her bridesmaids were just as sweet as she is and you could tell that today was about more than a wedding, it was about a celebration of true love. Congratulations Alanna & Jeff!

Thursday, May 31, 2012

Pretty in Pink - Bride: Cheryl

Last Saturday I had the honor of doing Cheryl's hair and makeup for her big day. When I stepped into her apartment, I immediately noticed all of the beautiful pink decorations for the wedding celebration and she noticed my pink hair. Can I say that nothing brings two people together faster than their love of pink? I believe this to be true.
And the rest of the morning was just fabulous. In the midst of wedding day chaos and excitement, Cheryl was such a sweetheart and joy to be around. It is such a sweet blessing to be allowed to be apart of an incredibly special day. Thank you, Cheryl, for sharing a little part of your day with me.
Congratulations to you and Paul!

Lipstick & loves,
Sara

Tuesday, May 29, 2012

Tip-full Tuesday: Healthy Summer Skin

Good morning Gorgeous!
First of all, I want to thank Camille for submitting this question. It's a great one. How do you keep your skin from unwanted breakouts in the summer months?

     As we enter into summer, we are undoubtedly going to be bogged down with sunscreen and, unfortunately and most likely, sweat. All of which can lead to us not feeling very glamorous as well as the potential for unwanted breakouts. So how can we combat it? With a few simple steps (that will help prevent breakouts and healthy glowing skin all year round) you will be ready to face the sticky summer heat with out worrying about unwanted visitors.

  1. Wash your face twice a day. I am a huge fan of Neutrogena's Deep Clean Cream Cleanser and there are great generic brand alternatives as well. Wash your face in the morning before you start your day and in the evening before you go to bed. This will give you a fresh starting point that will remove any excess dirt, oil and sweat from the previous night and will remove any makeup as well as excess dirt, oil and sweat from the day's activities.  Bonus: Instead of using your fingers, use a soft wash cloth and wash your face in a circular motion. This will gently exfoliate your face removing dead skin cells. 
  2. Use a moisturizer. I use Clean and Clear Dual Action Moisturizer. Not only does it moisturize my skin for the day, it also helps fight acne as well as providing a light layer of sun protection. SPF 15. 
  3. Use a Sunscreen. If you're going to be in the sun a lot, you will want to use a sunscreen that is stronger than SPF 15. Use a sunscreen that is designed for specifically for your face as well as for your skin type.  Click here for a list of suggestions.  
  4. Exfoliate once a week. You can skip this is you use a wash cloth to wash your face. Clinique's Exfoliating Scrub is wonderful, but a pricey for a face wash. Derma E, The Body Shop, Neutrogena and Clean and Clear all of great exfoliating facial cleansers. Just make sure that it's gentle - products like St. Ive's Apricot Scrub can be too harsh for skin which leads to irritation.  Exfoliating will help remove excess dirt, oil and dead skin cells you may not be able to get by just washing your face. Again, if you use a wash cloth to was your face, it will take care of this step. 
  5. Mask. Once a week, I use a mask to help penetrate deep into pores to get rid of excess dirt. This is especially important if you're using a lot of sunscreen that may be oily as it will trap dirt even more. At the moment, I'm using Clean & Clear's Black Head Eraser. Make sure to wash the mask of entirely and moisturize afterwards. 
As far as makeup products for the summer. It's hot, so keep it is light and simple if you can. If you don't need a full coverage foundation, opt for a tinted moisturizer instead. If you don't have a tinted moisturizer, you can always make one by mixing a little bit of your foundation with your moisturizer. Evens out skin tone while moisturizing.

Hope this helps & thanks for the question - keep 'em coming!

Lipstick & Loves,
Sara

Friday, May 25, 2012

SunScreen

Summer is here, and while we're getting a slight reprieve from the heat this weekend (hey - it's only supposed to be 95* today!), the temperatures are in fact climbing to the 3 digits and will stay there for the next year. Okay okay, that might be a bit of an exaggeration - but it will sure feel like that and pretty soon we will be wishing we could have a 95* day.  With the climbing temperatures, we are more aware of the sun's damaging rays than ever which means we're heading to Costco to buy 8 gallons of the best stuff we can find because we're in the dessert and it's hot.  Before you head to the store in search of the perfect sunscreen for you, here are a few sunscreen suggestions for your skin type:

Combination Skin & Oily Skin
- If you have combination skin, where certain areas are oily (typically the T-zone) and others are not or oily skin, you'll want to go for a sunscreen that is oil-free. 
  • Neutrogena Healthy Defense Oil-Free Daily Moisturizer SPF 50 - this non-greasy formula is light weight, oil-free while moisturizing and utilizing Neutrogena's patented Helioplex formula to provide superior protection against UVA and UVB rays. [available at: Neutrogena.com, Target, Wal-Mart, Ulta, Drug Stores, Grocery Stores]
  • Neutrogena Age-Shield Sunblock SPF 70/110 - this non-greasy, oil-free, PABA (Para-Amino Benzoic Acid)-free , and fragrance free sunblock provides protection using the Helioplex formula, shielding skin 6 levels deep,combats free radicals that accelerate the signs of aging, and is enriched with an anti-oxidant blend including Vitamins A, C and E that helps to maintain your youthful appearance. [available at: Neutrogena.com, Target, Wal-Mart, Ulta, Drug Stores, Grocery Stores]
  • Aveeno Continuous Protection for the Face SPF 30 - this oil-free, non-greasy formula is hypoallergenic, water resistant and utilizes Aveeno's patented Active Photobarrier Complex to maintain protection over time against UV rays and includes natural soy protein and vitamins A, C and E to promote skin health. [available at: Target, Wal-Mart, Ulta, Drug Stores, Grocery Stores]
Mature Skin - If you have skin that shows signs of aging, such as pigmentation, loss of skin tone or over-exposure to UV rays, you'll want to use a sunblock that is designed to enhance, protect and restore skin health.
  •  Neutrogena Age-Shield Sunblock SPF 70/110 - this non-greasy, oil-free, PABA (Para-Amino Benzoic Acid)-free, and fragrance free sunblock provides protection using the Helioplex formula, shielding skin 6 levels deep,combats free radicals that accelerate the signs of aging, and is enriched with an anti-oxidant blend including Vitamins A, C and E that helps to maintain your youthful appearance. [available at: Neutrogena.com, Target, Wal-Mart, Ulta, Drug Stores, Grocery Stores]
Uneven Skintone - If you have uneven skintone, where a region or area of skin is lighter or darker than the majority of the area surrounding it, you'll want to use sun protection that will work to even your skin tone out. 
  • DDF Enhancing Sun Protection - Enhancing Sun Protection SPF 30 blocks UVA and UVB rays while enhancing the skin tone for a healthy, radiant glow. Titanium dioxide and zinc oxide physically block UV rays to prevent against sunburn, hyperpigmentation, premature skin aging and even skin cancer. Antioxidants and anti-inflammatory ingredients are contained in a unique delivery system that wraps your skin in self-adjusting color spheres. These spheres change shades to perfectly match your skin tone, helping to even redness and provide sheer, flawless coverage with a soft, sun-kissed glow [Available at: Sephora, Dermstore.com]
  • Tinted Moisturizers:
    • Clinique Age Defense BB Cream SPF 30 - A tinted moisturizer with SPF protection, antioxidants for prevention and enough coverage to banish skin imperfections. Use as a primer before your foundation or use instead of your foundation. [Available at: Sephora, Nordstrom, Clinique.com] 
    • Sara McNamara Miracle Skin Transformer SPF 20 - A multitasking complexion enhancer designed to protect your skin with an antioxidant-rich hydrating base, primed smooth finish, weightless coverage, and SPF 20. The complex is formulated with a rich combination of vitamins to improve your skintone, luminosity, and texture, while minimizing the look of pores, fine lines, and imperfections. [Available at: Sephora]
Dry Skin - If your skin is rough, flaky or chapped in appearance, feels tight which can lead to irritation/itchiness you will want to use a sunscreen that also works as a moisturizer.
  • Neutrogena Ultra Sheer Dry-Touch Sunblock SPF 30/70/100+ - This dermatologist-tested formula uses Avobenzone to provide advanced protection against damaging UVA and UVB rays, along with Dry-Touch technology for an ultra-light, non-shiny finish. Fast-absorbing and waterproof, this non-oily formula is enriched with anti-oxidants to help skin fight the harm caused by environmental damage. It is oil-free, PABA (Para-Amino Benzoic Acid)-free, won't clog pores, sweat and water resistant. [Available at Neutrogena.com, Target, Wal-Mart, Ulta, Drug Stores, Grocery Stores] 
Sensitive Skin - If your skin is easily irritated skin, characterized by redness, itching, burning or other irritation you will want to use a sunscreen that is formulated specifically for sensitive skin.
  • Dermatoligica Super Sensitive Faceblock - An all-natural combination of zinc oxide, titanium oxide and other ingredients, including lavender, green tea and licorice. Fragrance- and color-free. [Available at:
  • Aveeno Natural Protection Mineral Block SPF 30 - This extra-gentle formula is specifically designed for sensitive skin and contains MINERALBLOCK™ Technology with 100% naturally-sourced active ingredients, a more natural alternative. It also includes skin-soothing Active Naturals oat to ensure that your delicate skin is protected and not irritated. It is oil-free, fragrance-free, waterproof, hypoallergenic and non-whitening. [Available at: Aveeno.com, Target, Wal-Mart, Drug Stores, Grocery Stores, Ulta]
Normal Skin - If you have normal skin, any sunblock will work for you. I always suggest an oil-free sunblock. Lately, I've been using Aveeno Continuous Protection for the Face.